List of contents:
- How does quality switching work
- How to Implement Quality Switching with FV Player
- Notes and best practices
Video quality switching gives you the ability to serve the right quality of video to all of your viewers and customers. With quality switching, every visitor can choose a quality appropriate to their bandwidth restrictions. You no longer need to worry about your video not playing on mobile or looking pixelated on large screens.
How does quality switching work
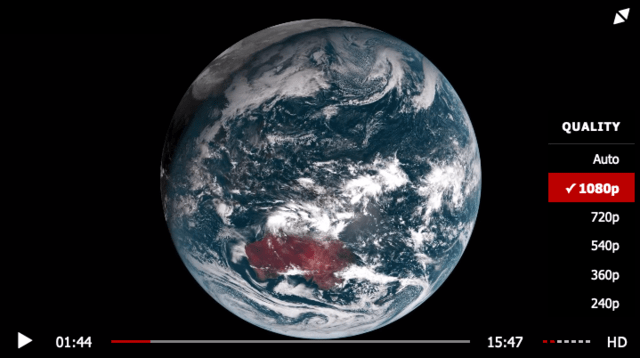
Play the video and pick the quality in options on the controlbar. The video quality will switch on the go. The selected preferred quality is stored as a cookie and therefore you get your preferred quality across the site (matching video site-wide) Of course, the viewer can switch the quality again anytime.
The above player plays mobile (480×272), standard definition (640×360) and high definition (940×544) MP4 and WebM videos.
HLS Exception: Users playing HLS video on iOS do not get visual quality switching options, as HLS has automated quality selection built-in.
How to Implement Quality Switching with FV Player
1. Update to the latest FV Player Pro version. If you are a licensed user, you can install a Pro addon for our plugin containing this feature. If you wish to upgrade your player to use this feature, you can purchase a license.
2. In wordpress admin panel of your webpage go to Settings > FV Player Pro > scroll down to Quality Switching.
3. Enter file quality names along with labels into the given fields. File naming scheme can involve frame height or abbreviation for video quality. Since videos might have various ranges of quality it might be better to choose name for range of quality. Enter one item per line. To add more quality options, click Add quality settings. When you are done, click Save All Changes.

Adding quality settings
The Naming scheme is also a part of the scheme by which you name your files as -hd, -sd, -mobile.
The setting in the first row will be the default quality. For example, in the setting below it’s HD.

The default quality in FV Player’s Quality Switching settings
Even if the link in the shortcode is for example “-sd.mp4”, the playback will start with the default quality, which in this case is HD. When a user switches quality to for instance SD, it gets recorded in the browser and the video will still start in HD, but will switch to SD immediately.
Switching to a quality which has a missing file will not break the playback as the player will automatically switch back to the remembered one. The video will fail only if the default quality is missing on the server.
Label is what will appear in options of the player when a user wants to switch quality.
For example:

FV Player’s controls for quality switching
4. Prepare your video in desired qualities and upload them to one location. Let’s say you want to provide HD, SD and a mobile version of your video. When you have a look at the video directory listing, you should see:
your-video-HD.mp4
your-video-SD.mp4
your-video-mobile.mp4
All of them should be on (nearly) the same URL:
http://videos.my-site.com/my-chosen-directory/your-video-HD.mp4
http://videos.my-site.com/my-chosen-directory/your-video-SD.mp4
http://videos.my-site.com/my-chosen-directory/your-video-mobile.mp4
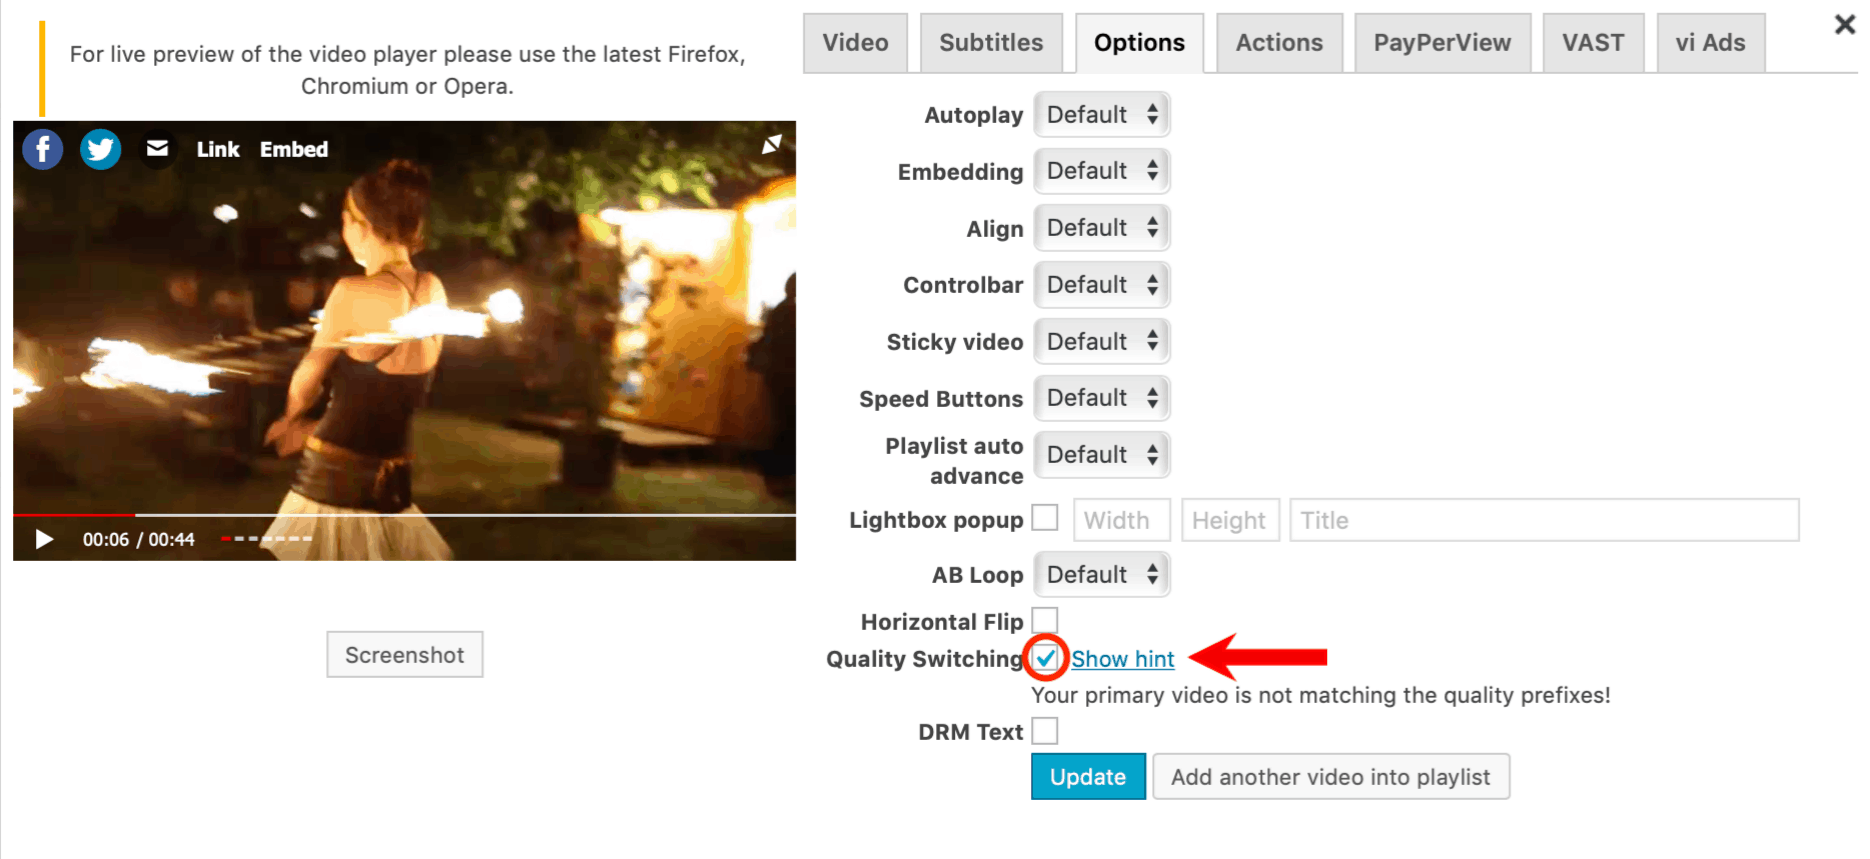
5. Now insert your video with shortcode editor. Insert video in quality you want to set up as default. Select the Quality selection box. We included helpful hint (Show hint) to make sure all your video files are available and using correct format.
Helpful hint will tell you your default video quality and shows you which files have to be available for other quality options. In case your file naming scheme does not match, the hint will point out the mistake. (“Your primary video is not matching the quality prefixes“).
This is what the result looks like:
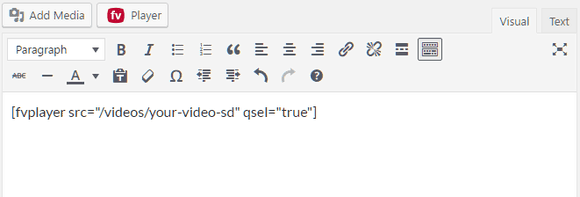
6. Alternatively, insert your video using shortcode. You only need to enter the shortcode for a video in a quality you want to serve as a default one.
[fvplayer src="http://video.your-site/video-SD.mp4" qsel="true"]
The qsel parameters tell the shortcode, that your video available as /videos/your-video-sd.mp4 is also available in -mobile and -hd quality. It literally just replaces “-sd” with “-mobile” and “-hd”, so all the videos in which you use qsel=”true” have to respect the naming.
Then our plugin will see that you enabled quality switching for the video and that the video matches the -SD quality and will add -HD and -mobile automatically.
A few notes and best practices:
-
HLS handles quality switching internally. Your video provider should be able to create a HLS for you which will already have the different quality versions in it. HLS has one significant advantage: loading of MP4 videos is rather slow on iOS devices which would make manual switching clumsy.
-
The mobile video applies to any mobile device and not every mobile device plays HLS (only iDevices do actually). It’s best to use MP4 for mobile video.
-
We recommend that you use following encoding settings with following resolutions and bitrates:
- 480 x 270 px, 356 kbps – your mobile quality
- 640 x 360 px, 700 kbps – SD video
- 1280 x 720 px, 2000 kbps – HD video


Leave a Reply