List of contents:
Registration
To start using ExoClick ads with your videos, you will need two things. The first FV Player VAST – you can purchase it here. The second one is an active Publisher account on ExoClick.com. Creating such account is free and doesn’t require any payment credentials.
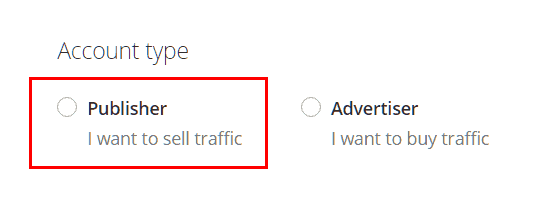
You can create one by clicking the Sign Up buttton on their website, filling out the details and selecting the Publisher account type.

Pick the Publishers type of account
Afterwards just confirm the registration via the confirmation email and you can proceed to creating ads.
Adding Your Site
Log into your account and pick Sites & Ad Zones in the top menu. Here you can add websites you want the ads to be served on, and eventually create the individual ad formats (called Ad Zones) that you will implement in them. You can also edit the settings of both whenever you want.
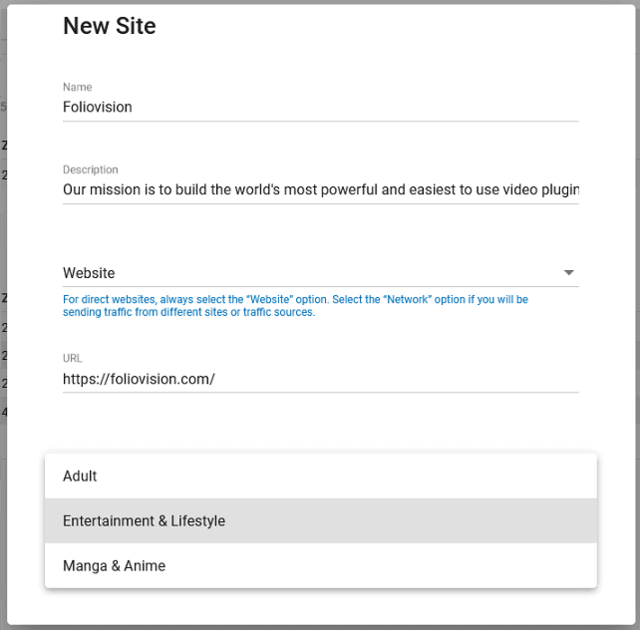
When you don’t have anything set up, you will automatically be transferred to the screen where you add a new site. Fill out all the fields. The “Main Category” field has only three categories in the drop down menu at the moment. Entertainment & Lifestyle being the most general of them at this moment. Selecting the category will determine the sub-categories you will be able to select in the Ad Zone settings later. You can always edit this setting.

Select the category that fits your website content the most
Creating the Ad Zones
Back in your dashboard, click NEW ZONE. FV Player VAST supports both In-stream Video and In-Video Banner formats.
In-Stream Video
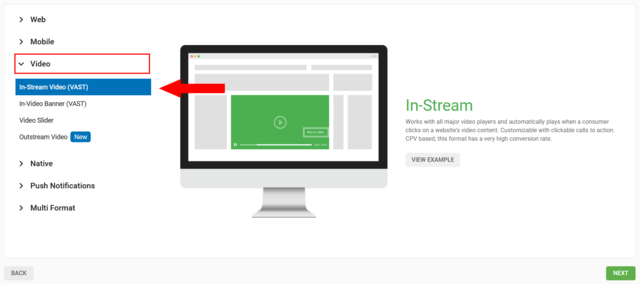
Select the In-Stream Video (VAST) in the Video section. Then click Next.
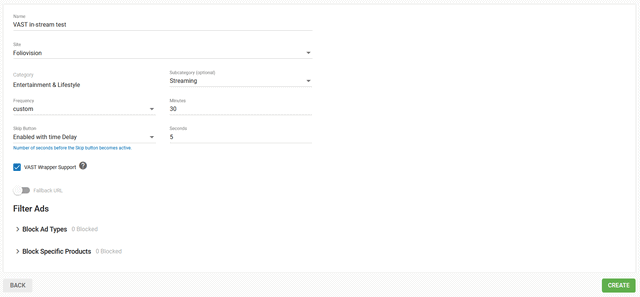
Now you can set the actual ad parameters:
- Name – name the ad zone arbitrarily.
- Site – the website on which the ad will be used. You can select more, if you’ve set up more than one website.
- Category – here you can see the main category setting of your website which you selected earlier. This cannot be changed.
- Subcategory (optional) – this field will determine the content of your ads. Select the option that you want, or that fits the content of your website the most.
- Frequency – Here you can set how often this ad will appear. There are presets from 24 to 3 hours, or the option to use custom frequency.
- Skip button – choose if the skip button is enabled and at what time delay.
- VAST Wrapper Support – Leave this enabled.
- VAST Block Ad Types and Block Specific Products – This lets you pick what types of ads and types of products will be excluded from the ad zone. For example, blocking adult content ads.
After hitting Create, you will be presented with the generated VAST URL. Leave Another VAST-Compatible player option selected and copy the URL. You can find out where to insert the VAST URL in our VAST guide.
In-Video Banner
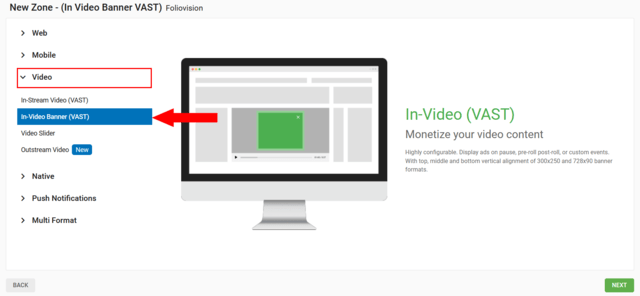
Select the In-Video Banner (VAST) in the Video section of the New Zone screen. Then click Next.
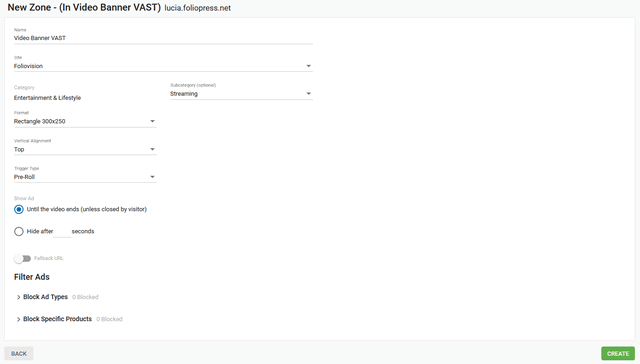
Now you can set the actual ad parameters:
Proceed with setting the Name, Site, Category and Subcategory just like with In-Stream Video.
Then:
- Format – set the size of the banner.
- Vertical Alignment – whether the ad should be located in top, middle or bottom part of the video.
- Trigger Type – when should the ad show up. For example, on pause or with a custom delay.
- Show Ad – if the ad should hide automatically or has to be acted upon by the visitor.
You also get to block and filter types of ads and types of products just like with the In-Stream Video ad zone.
After hitting Create, you will be presented with the generated VAST URL. Leave Another VAST-Compatible player option selected and copy the URL. You can find out where to insert the VAST URL in our VAST guide.
Example
In-Video Banner
In-Stream Video
The ad won’t load every time, since the ad container might be empty – that’s due to the ad server settings. Read more in the ExoClick FAQ.
